1.23.2020

A Random Shot done with the un-random Sony RX10iii.

Eeyore's Birthday Party. Austin, Texas.
Loving the sunglasses.

The beauty of a camera with a very good, small sensor is its ability to have a very long zoom range along with amazingly good image stabilization. Being able to "pluck" beautiful photographs from a sea of people is just....cool. 

The two cameras I can recommend for this are the Sony RX10 series (iii and iv) and the Panasonic FZ2500. Used well both can deliver very good and visually interesting results.

1.21.2020

Red Rental Scooter Relinquished Right in the middle of the Right of Way. It's a nasty, nasty business...


I've been playing around with Luminar 4.1 and I'm having fun with it. Most of the presets are over the top but the slider controls in the development interface are really pretty good.

Lou. Not retouched in Luminar.

Some Facial retouch. And a tiny bit of lip color.

Skin Enhancer and a bit of vignette. 

Dodge hair, burn background, add "Orton" effect (which is much like the diffusion we used to do under the enlarger.......)

I'm normally not a sucker for too many programs that promise the moon for landscape and portrait "enhancements" but Luminar 4.1 has gotten a lot of positive reviews and a decent sprinkling of critical reviews as well. I was convinced to buy it and try it by good friend, Frank, who had much good to say about the program's ability to replace skies quickly and effectively. That was the push I needed but I'd had the program on my radar because of several videos I watched that showed off the reasonably powerful portrait retouching capabilities, as well. 

So, what is Luminar? It's a software application that's been around for a few years but in its latest iteration it's been upgraded to use what the makers are implying? is artificial intelligence. It's a program that allows you to work on image files to fix things that were deficient when you took the photo (color balance, contrast, white balance, etc.) or to change the photograph, either subtly or profoundly, with "enhancement" sliders and/or canned presets. 

The buzz that accompanies the introduction of 4.0 and 4.1 is that the program now has magical powers that allow photographers to seamlessly and effectively drop in new skies in landscape photographs with nothing more than one button push and a bit of slider work. I'm a neophyte with the program but I tried the sky replacement in the final image below (along with the addition of dramatic sun rays) and I find that the program does a great job finding and separating skies form everything else. I had fun with it but will enjoy it much more if I get around to loading the 3,000+ skies I have in my "clouds and skies" folder. 

Many of the low cost (compared to Adobe products) image manipulation products on the market seem to only work with Jpegs and Tiffs but I've tried Luminar 4.1 with several raw files and it does work. The only disconcerting part of the process is when you finally save out the image. It seems that most of the screen representation that happens when you are working on an image is done with proxy files and then, when you go to save to a hard drive, the program switches to applying all of your changes on the full size file. With a high res file from the 47 megapixel Lumix S1R there is a long wait time (10 or 15 seconds) between pushing return and seeing the process completed. That makes this program a non-starter for me when I'm involved in doing many, many files in post production but is not at all a problem if I'm trying to tweak and massage one file at a time. 

But...as most of you know I'm more of a people photographer and not so much a landscape maven. So, how is Luminar with portraits? I think it's a really good "finishing" program and when the program automatically recognizes faces it does a great job applying some of the automated features as you go through the portrait enhancement menus. A few small things reveal it's economy class capabilities. For example, you can choose to enlarge a subject's eyes with a slider but, unlike the controls in PhotoShop's liquify filter, you can't select each eye individually and use the control to equalize their size. I use that all the time in PS. Why? Because people are very rarely symmetrical. One eye is almost always bigger than the other. But people like very much to see their own eyes equalized for size in final portraits. 

For most facial retouching Adobe offers much more detailed control over critical variables. 

I see Luminar as an adjunct to Photoshop in the same way that I use SnapSeed for quick and fun corrections to files I want to post online quickly. But with that being said I was very happy with the skin enhancement feature in Luminar, even though it's controlled by a single slider. It does a nice job, when used with a light touch, in minimizing aesthetically unpleasing skin texture without imparting a Barbie Doll Plasticity to the final image.

There's one feature that plays to my nostalgia for the darkroom. I used to have a device I could use under the enlarging lens that would allow for variable levels of diffusion in a final print and which would nicely blend the shadows into the highlights in a way that mimicked older portrait lenses. The feature is called, "Orton Effect" and I used it on the very bottom variation of Lou's portrait above. 
It takes a bit of the overt, digital sharpness out of files without destroying them altogether. 

The program has layers functionality but I haven't had time to test them out yet. It also has dodge and burn tools and I've found them to be easy to use and set up well. 

While the program would love to create yet another library on your hard drive and put all of your images in there the creators must have realized that this rigidity of workflow made lots of early Capture One users crazy with frustration so they've also provided the option of bringing in one file at a time and working with it normally. 

For $89 it's a pretty good deal. If I were not doing Photography for clients, and was only making prints for myself, I think I could use Luminar for about 97.5% of my work. But I'll hedge that by saying that I haven't yet done the work to figure out how to dust spot and do small, individual corrections (take out one pimple, eradicate one stray hair) yet. When I master that I'll probably spend most of my post time for portraits in Luminar and use Photoshop for intricate or complex corrections and fixes. 

(the images below are samples and are not meant to be considered the finest examples of my photographic art....). 

FYI, you can trial the program for free. I don't sell it and I don't do affiliate links so I'll leave it up to you to simply Google: Luminar 4 and find your own way down that yellow brick road.

As Shot.

with "AI" enhancements.

A dramatic and over the top sky replacement.

1.20.2020

How much really needs to be in focus? How soft can objects go in the background and still be recognizable? Does it matter?

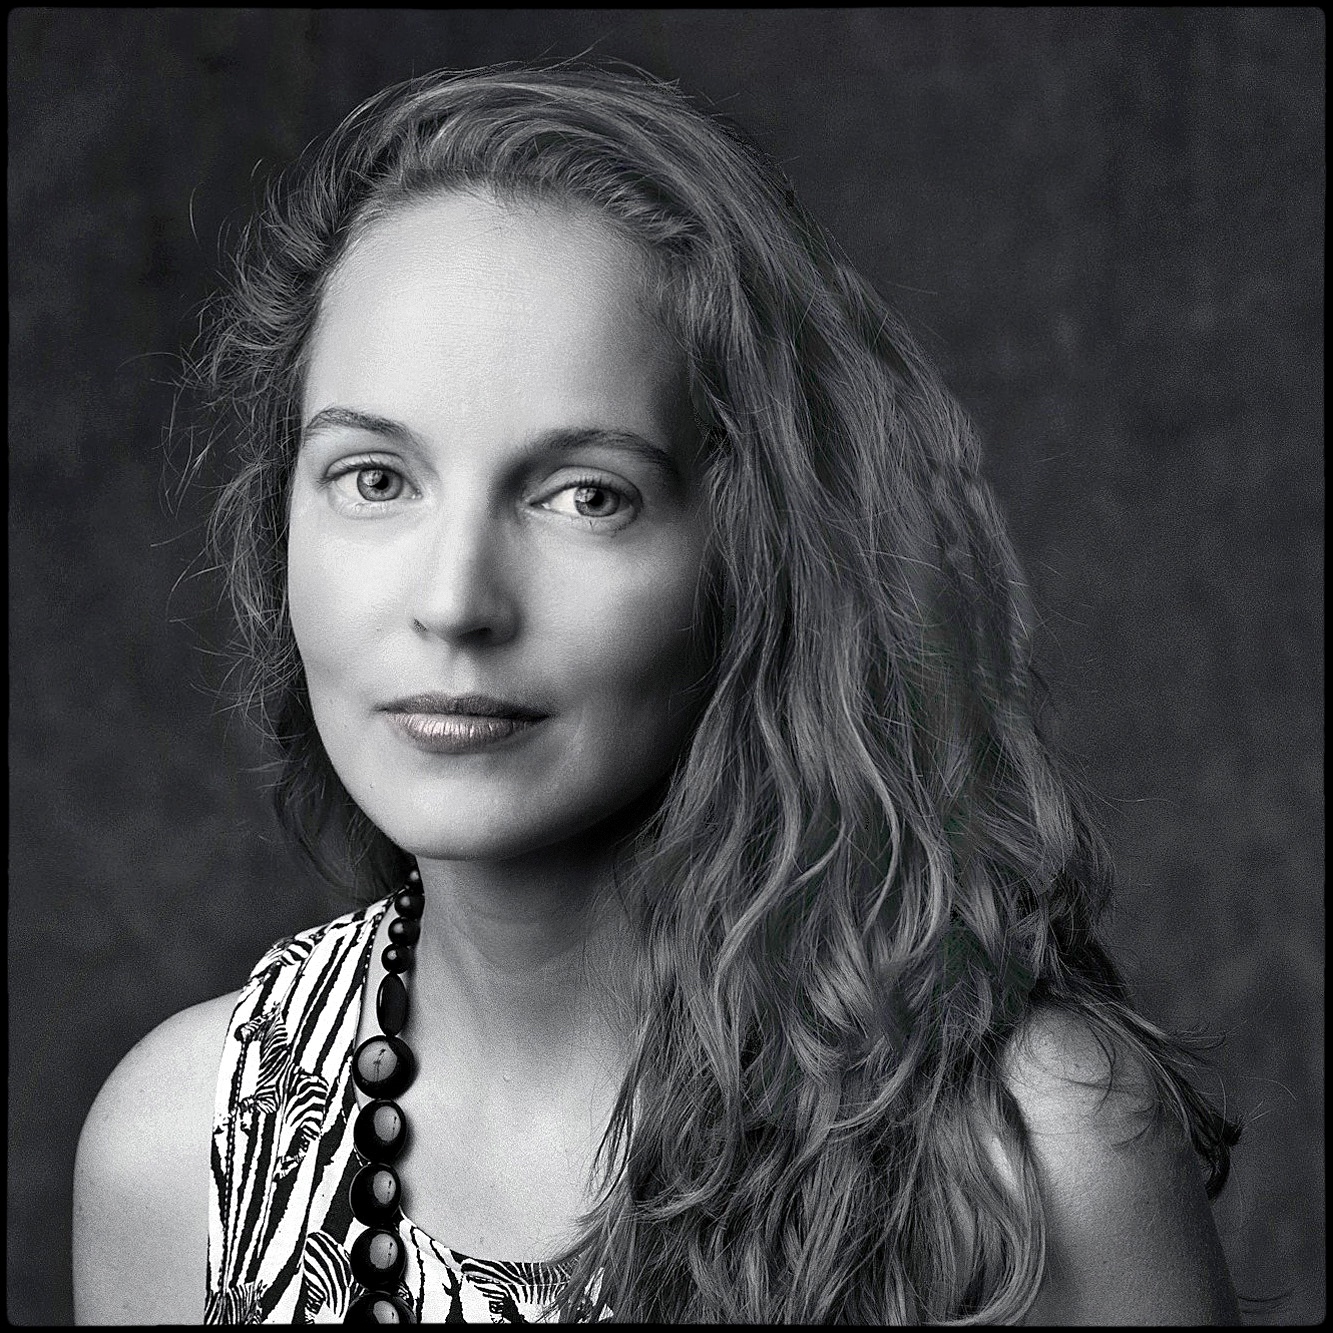
Mary Bridget Davies as "Janis Joplin" in Zach Theatre's, "A Night with Janis Joplin.

Right up front we should consider that there are two decision making branches we take when we choose what focal length and which aperture we end up using for a particular shot, or series of shots. The first branch might be the one in which the photographer has complete and absolute technical control over all aspects of making a photograph and can choose exactly which focal length lens and what aperture to use in order to get exactly what they want to get in sharp focus, and what they don't need to have in that zone of sharp focus. This might entail being able to shoot with as much light as you could possibly want. It might also pertain to a situation in which you are shooting an exterior location, have great sun light and a crew of many who can put up giant silks to diffuse the sun in order to get the quality of the light just perfect.

If you have total control over the camera, the lens settings, and the light you get to choose the f-stop that will give you exactly what you want/need for your project. 

In many cases this way of working is the basis of advertising work. You get to cast the perfect model. Your stylist dresses them in the perfect selection of clothes. Your make up and hair people pull off the look you had banging around in your head as you planned the project. The lighting is flawless and nearly infinitely controllable. Ah, it's good to work with god-like control!

But there is a second branch of decision making which is based on pure need. The need to get a usable image into your camera in situations where the only control you have is how to handle the settings on your camera and lens, and also where you point the lens. Oh, and exactly where you are going to place the point of focus to make it all work for you. 

In these situations you will, in my experience, not be able to control the lighting, the movement of the subjects, the speed of the action, the costumes or the pace of the shoot. If you usually like to have full control over what happens on a shoot then situations in which you have little to no control are a hard learning process where your overriding goal is to get the best stuff you can while realizing that your photography is a lower priority to the process you happen to be photographing than just about anything else on the set.

In these situations you are likely trying to find a fast enough shutter speed to actually freeze most action  and, if you shoot like me, you'll probably be looking for 1/250th of second or a little faster (shorter). You might not always be able to freeze hand motion, because hands move faster than bodies, but you'll have a good chance of getting your subject still enough. Once you've got a shutter speed that both "freezes" action and allows you to handhold well enough you'll probably want to select the highest ISO you can reasonably live with. If you are in a "high" illumination setting then --- congratulations! You'll have a wider range of ISOs to choose from and more leeway in selecting a corresponding aperture. But if you live in most of the real world (or in the U.K. where readers constantly write to tell me that even at high noon in the dead of Summer the light is so dim that it's hard to even read a book outdoors...) you might find yourself selecting ISO 3200 or 6400 as your best choice, image-wise, in a particular environment. Especially when working indoors. Then, looking at your choices you find yourself locked into something like f1.4, f2.0 or f2.8 as being your best choices to balance out the exposure/motion-stopping/low-enough-noise equation.

In these cases the choice of whether or not to blur the background, to a certain extent, is largely made for you. Sure, you can try using wider lenses but you risk changing the perspective and/or the shooting distances that make for a comfortable photo.  In the photo at the top of the page I needed the right shutter speed to stop hair movement, and subject body and expression movement. It had to be 1/250th or faster. The low light had me cranking up the ISO to 4000 and that left me with an acceptable aperture of f2.5. With an 85mm lens, and the way the subject-to-background subject fell out, the person in the back, right side of the frame, is more suggestion than substance. 
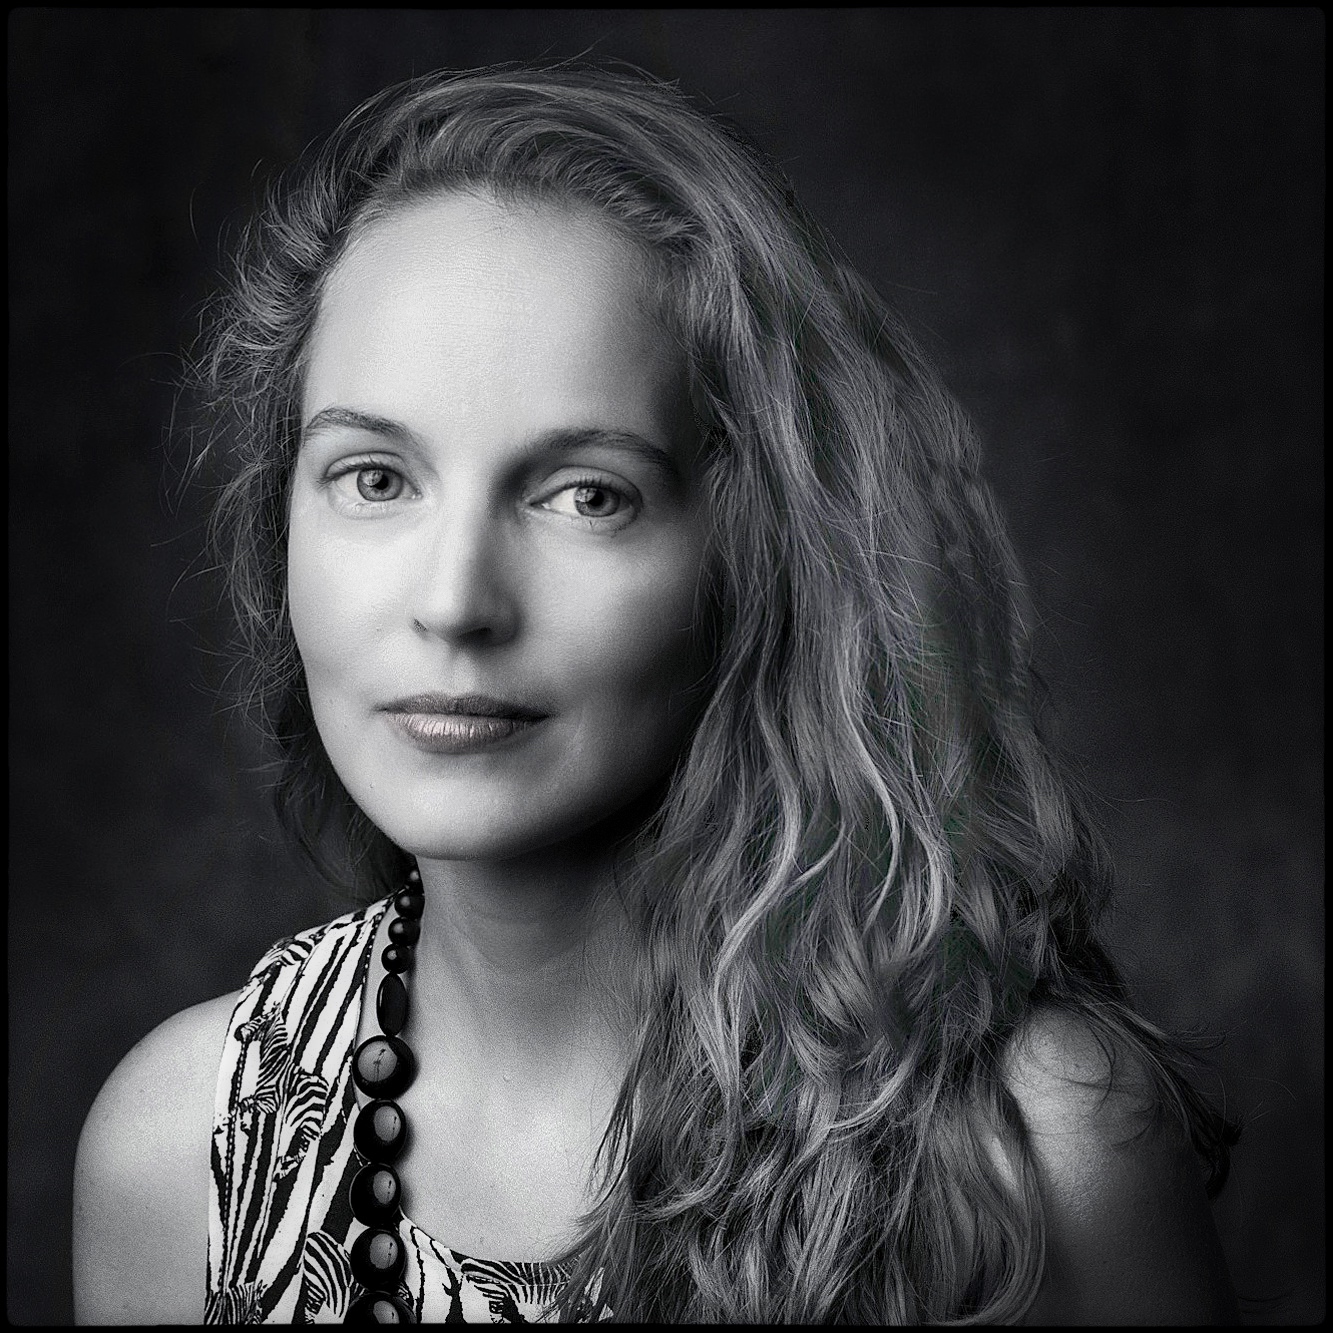
In the photo just above the person in the foreground was further from the camera (I cropped in to the square) and closer to the person in the background. I think it's less trendy, at least in terms of how humans really process scenes with their eyes and brains. 

The bottom frame, just below, is the sweet spot for me. It was also shot from a further camera to subject distance than the top image and also cropped. The actor was moving slower so I hazarded a shutter speed of 1/125th which allowed for a aperture of f2.8 which, in turn, gave me a bit more focus on the stool and guitar in the background. I like it because the guitar is an important symbol for the production. 

While I was making these images I was daydreaming about putting 12 large (4x6 foot) softboxes up in the rafters and powering each one with a 1200 watt second flash generator. I would then be able to shoot as lower ISOs and smaller apertures---and with electronic flash I wouldn't have to worry much about using shutter speed to freezing motion. 

But I actually remembered doing shoots like that when we were using medium format film cameras to do the same kind of work (but with fewer soft boxes and heads). It was incredibly time consuming to rig something like that (plan on at least a day of pre-production) and to trigger all the lights. With medium format cameras and ISO 100 film though it made for really high quality images, reliably. But not much better in overall image quality than what we can get out of today's miracle cameras and lenses. 

Today's work looks different because we're playing right at the edges of acceptable camera/aperture settings. The older work had more front-to-back focus but was so much less spontaneous. And then there was the cost!!! I calculated the cost of banging off 2,800 medium format film shots with 12 shots on a roll. It's approximately 233 rolls of film (X 12 frames per roll) which, with processing included cost about @$15 per roll, and would have set the client back somewhere around $3,495. Just in film and processing; not counting Polaroid tests and the manpower to keep a bunch of film backs loaded and humming. Not to mention the rental fees on a truck load of lighting...

Choice is more expensive than working with what you have. But sometimes the unknown and the surprises make winging it a lot more fun. I've enjoyed working at the edge of wide open for the last week or so. It's an acquired taste and, like haggis, not something I want at every meal. But it works when you have to get the shot and circumstances limit your options. 

Then it's: Go wide open or go home.