Sunday, March 21, 2021

Some notes on post production in the Spring of 2021.


 I thought I'd change gears here for a day and talk seriously about post processing in this day and age. 

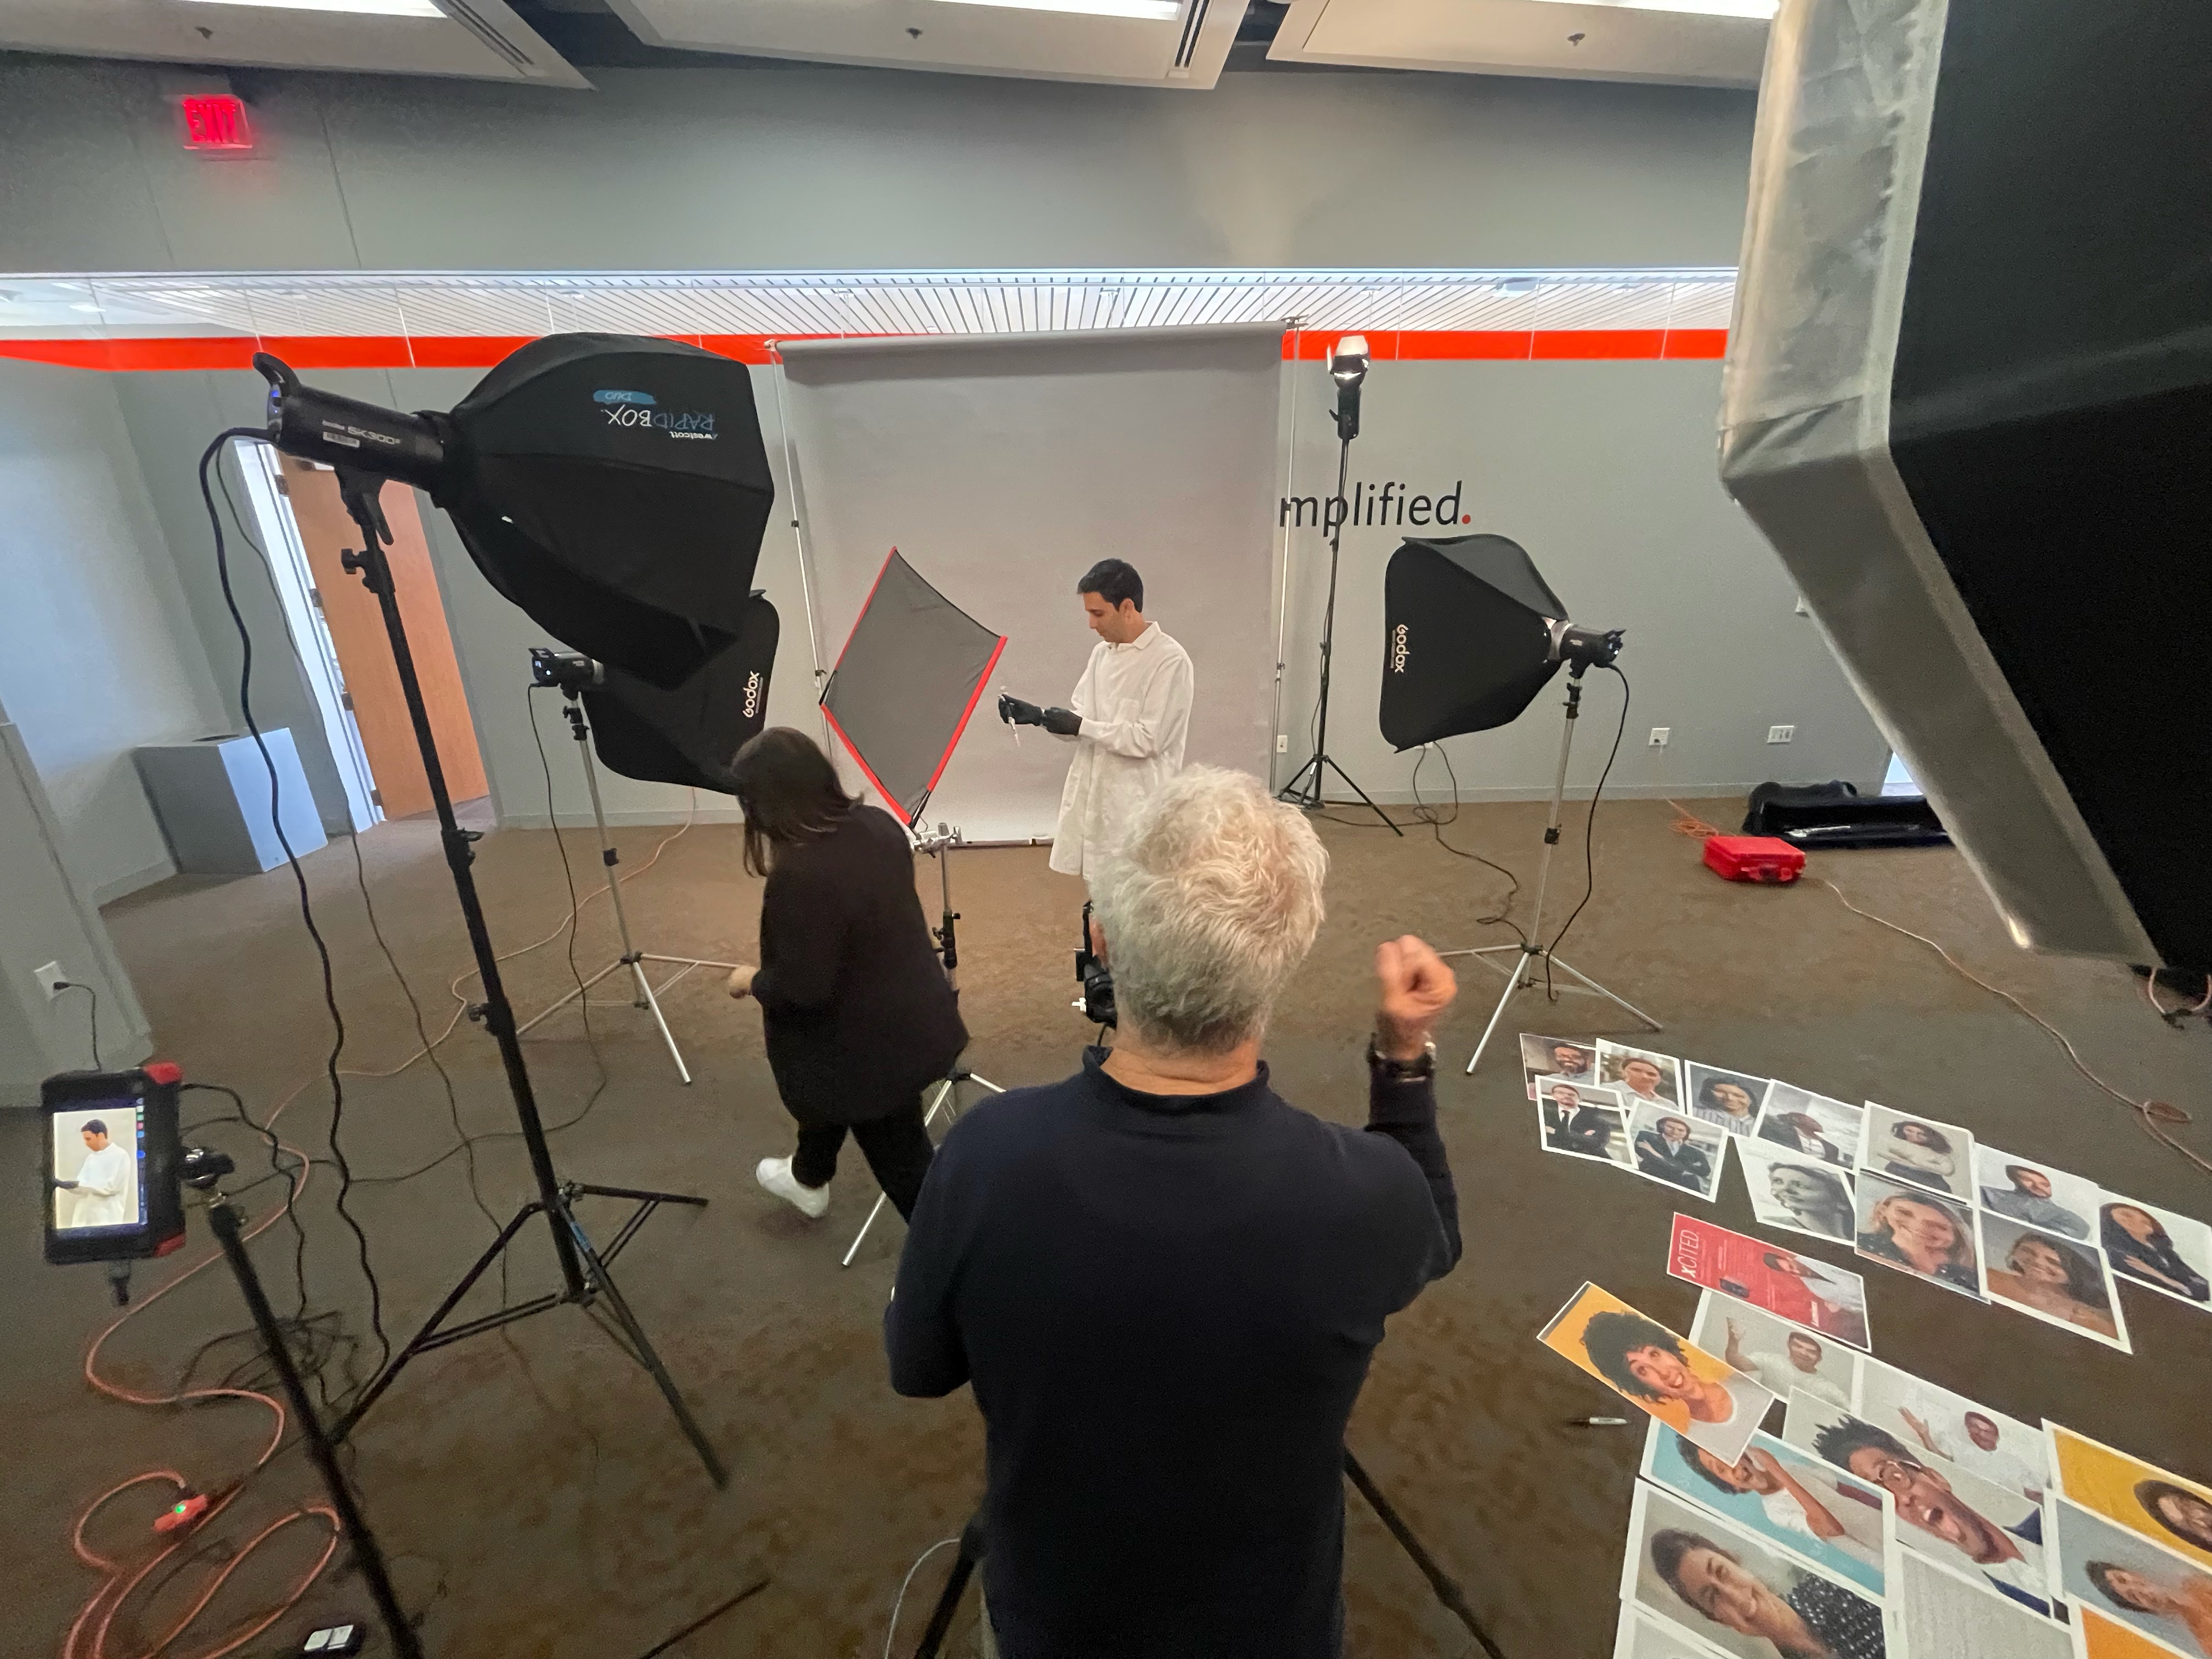
We did a photo assignment last Thursday which generated nearly 3,000 large (24 mpxl) raw files. The project was to photograph six individual models in white lab coats. The brief called for the models to be "animated/excited."  The "take" needed to be edited down and then quickly shared with the client. The client made 36 selections yesterday and I spent the better part of an eight hour day enhancing the files and dropping out the light gray background we used. 

The photography part of the equation; the actually pushing of shutters and positioning lights, is probably old hat for most of you. It was a straightforward exercise in lighting with soft boxes and electronic flashes. The one addition, driven by the need to preserve detail in the lab coats, was the constant use of a "net" to block some of the light falling onto each model's shoulder. The shoulder closest to the main light. Nets are like neutral density filters for the light coming to the model. They can be feathered and they are constructed so that there's no shadow line on the subject. Useful for controlling how much light you want on specific parts of a subject. 

The stuff that interested me this time was the post production. As soon as the shoot was over and I was back in the studio I did a very quick edit in Lightroom and dumped about 1,000 files that were flawed in one way or another. I converted the remaining 2,000 files from raw to Jpeg so I could upload the Jpegs to Smugmug.com. I didn't need outrageous file sizes or ultimate resolution so I made the Jpegs 3200 pixels on the long side with a Jpeg quality setting of 90. The iMac Pro I bought 15 months ago whipped the files out fairly quickly and the upload was snappy and uneventful. 

I like presenting galleries on Smugmug to clients for a couple of reasons. If I save the files at their full size and highest quality settings (still as Jpegs...) I can use the resulting galleries as a third tier of my back-up. The client is able to access their gallery from anywhere. Multiple people on the client side can use the gallery at the same time. This would allow a large company, with locations in multiple cities or countries, to get buy-in from associates in far-flung offices. I can set a maximum download size and let clients download files individually. They like this because they can use the images for placement in comps while figuring out exactly what image and which cropping would work best in a layout. I can assign a separate password for downloading privileges so marketing people can decide who has access to shareable content. 

The gallery of images for Thursday's client was up and running on Friday morning and they quickly selected the 36 images included in my bid for post processing. That's where the real story starts for me about post production...

Here's the way I did it. If you have a better workflow, please share it!

I open the raw files one at a time in PhotoShop via the Camera Raw interface. In that interface I make as many corrections and adjustments as I can. These include fine tuning color temperature, opening up shadows, creating a custom curve to hold onto highlights in white lab coats, and cropping the image into a usable size. 

When I finish doing those things I used the new "Enchanced Enlargement" tool just introduced in the latest update to PS. This doubles the pixel count while using A.I. to refine and sharpen details. What I end up working on with this additional processing are 140-200 megabyte files in 16 bit. 

Once the files are open I make any additional color, tone or retouching corrections and then I go to the selection tool and click on it which opens two buttons in the top menu bar. These are "select subject" and "Select and Mask." I hit the first one, "select subject" and the program does a very good job (if I've shot everything correctly...) selecting the actual subject and rejecting the background. I can see by examining the "marching ants" outline that the tool either worked or failed. Once I've examined my outline selection and am happy with what it has selected I hit the "select and mask" button this uses the subject selection to create a good, tight mask which separates the subject form the background. 

This part of the process is rarely perfect. There's always some things that gets included but should not or something that gets masked out (the tops of ears! the ends of fingers! ) that very much needs to be included. This is the part of the process where you get to go in and try two different fixes to get your file selection exactly as you want it. When I'm in this stage of the process I like to work with the image at 100% and carefully check every edge. 100% on a file that's 12,000 pixels on the long end is quite a close range observation but you catch more artifacts and glitches this way. 

The first of the two tools is the "refine edge" brush tool. You can change the diameter and use the tool to smooth edges and make small adjustments to what stays in and what goes out. I like to use this for hair as you can make sure you've selected the hair from the background so it looks realistic when the client drops the image of a person onto a new background. I use it around edges that might look a bit rough due to the initial selection process. It's a great tool and the associated menu gives you an almost infinite amount of control for edge detection, feathering, contrast and other fine-tuning parameters. Light touch or heavy touch? It's totally up to you. The tool works best when there is a good contrast and color difference between the background and the subject. The more alike the foreground and background the worse the performance. 

The second tool is a brush tool which adds to or subtracts from a selection mask. I might have part of a white sleeve that doesn't get selected along with the subject. Since the mask visualization is 50% opaque ( you change the percentage) I can see detail under the mask that may need to be included but is currently outside the mask. I use the brush tool to wipe over the desired but excluded detail and it erases the part of the mask blocking the detail from showing up. If I've included details I don't want on the edges I can hold down the option key while brushing and it adds to the mask.

Once I think the selection and masking are optimal I can choose a number of ways to save the image. Since I'll be delivering these to a graphic designer who will be compositing them into a background she'll be creating she'll want the image with the background dropped out and the subject floating in a transparent layer. I select "new layer" and PS adds a layer with the subject visible and the background dropped out above the original background image which is how the image looked after the raw ingestion but before the selection process. 

I save the completed file in layers as a 16 bit Tiff. The file sizes of the finished 36 files ranged from 300 to 400 megabytes apiece but they are big, sharp and easy to use. The client will most probably convert from 16 bit to 8 bit but might want to stay in 16 bit if they have some additional, tricky color work they'd like to do on the files.

The time consuming part of each image refinement lies in the fine-tuning of the selection edges before committing to the final step of outputting the file to a layered format. I can spend half an hour getting the hair and edges of an image looking just right but I have to say that it beats the heck out of the "old school" way of selection in PhotoShop, using the pen tool to make point-by-point clipping paths...

On projects like this one which include bigger rights packages (yes, that's still a thing...) I like to give my clients a folder of the finished Tiffs as well as the original raw files (in case I get hit by a truck and they still need to use the files) and the intermediate .DNG files which are created in the Enchanced Enlargement process in Camera Raw. 

While I have to give up a bit of control, giving the client the raw material means fewer panicky phone calls from folks looking for different files or wanting to create different looks under super tight deadlines. They are generally as good at post production as I am and can grab the file they want to do their own post processing. Post processing isn't really a profit center for me; I have fun and make my money shooting the images and doing the production. The post production stuff can be creative but I don't have the mindset to make it too complex and creative. I feel sometimes that it's like washing the dishes and pots and pans after cooking dinner. It's not as much fun as cooking, far less fun that eating a good dinner, but a necessary part of the whole project. 

A few things about shooting with the intent to drop out backgrounds:

1.  Working with higher resolution files works better than working with lower ones. 

2.  Automated selection tools work better with files that are in sharp focus. 

3.  Soft focus or soft edges can be problematic with automated selection tools.

4.  My highest success rate comes from files shot at f8 to f16.

5. Flash is a good idea for this kind of work because it freezes most motion.

6. Automated selection tools are almost never a good match for images with motion blur. 

7.  The "refine edge" tool hates soft edges. The brush tool for adding and subtracting masked

     areas is ambivalent about soft edges. 

8.  Nailing focus is important and the corollary for me is the discovery that eye detect AF

     doesn't work as well with subjects who are jumping up and down. Best to make D-o-F your

     friend on these kinds of shoots. 

9.  Take some extra time to fix stuff on your set, like burned out white areas on a medical 

     white coat. It will make life easier in post production. 

And, finally, be sure you have the life affirming elixir we call "coffee" at hand when you need to take a break, walk away and find, once again, a reason to go on....

So, after swim practice yesterday I spent most of the day huddled down in my office; mouse in one hand, keyboard under the other, grinding away on the images I'll be handing off tomorrow. And that's enough work for this month...

Friday, March 19, 2021

A Caption-Fest Blog. Unconnected splinters of reality while cruising along in sunglasses and a hat. And yes... pants.


Every time I leave the house with a Fuji X100V I use it in a different way but when I look at the images after I get back to my office I'm always a bit amazed at how much I like the files. I had no real ambition today other than to cover some miles and get some fresh air but the camera can't be denied when it's ready to shoot. I've grown insanely fond of the built-in, four stop neutral density filter. I can shoot stuff like the stickers on this pole at f2.0 and join the "endless bokeh" crowd without even breaking a sweat...

Everywhere I go in central Texas there's a company making whiskey. The only local stuff I've tried is Nine Banded Whiskey (because one of my fellow swimmers is a partner in the venture...) and Milam Whiskey, from Blanco, Texas. They're both pretty good but then I'm probably a highly flawed judge since it's not something I enjoy on a regular basis...

There is a trend in Austin, and it may be nationwide, to have bar with lots of outdoor seating and then have a food trailer somewhere adjacent to the outdoor seating. Contained within the confines of the bar's "space" but somehow also separate. Taco Flats was a popular Austin Tex-Mex restaurant back in the 1980's and I guess this is the (final?) iteration --- an afterthought on the grounds of a booze factory.

I'm going to go out on a limb and guess that, if you are a UT student and you are getting stumbling drunk on Sixth St. most tacos will probably pass your taste test. With flying colors. Ew. Flying colors....I just got that. The old "Technicolor Yawn." 

I have little to say about this image from a 1950's advertisement plucked from one of the general interest magazines of the period. It actually does a yeoman like job multi-tasking poor taste, racism and sexism all in one go. I'm not really sure why a current company rehabbing a downtown space would decide to paper the windows during construction with ads like this but, on the other hand, there were probably even worse advertising messages back then. Hey, I just report on what I see. Note that the gentleman on the far right is holding what appears to be a Speed Graphic down by his waist...

This is exterior wall art for a new bar on West Sixth St. It makes me think of the Beatles "Sgt. Pepper's Lonely Hearts Club Band." Maybe that's Mr. Kight. While the drawing of the man evokes a UK or EU image from the past the white and red stripes remind me of the land of the rising sun. A strange melange when taken in with the green fence just in front. 

When I rounded the corner from the weightlifter on one side of the bar I looked up and noticed that there were lights strewn above the roof's edge. They seem to echo the color scheme of the background graphic in the image just above. I was happy the X100V has a digital teleconverter function because the image would have been too far away to work in a 35mm frame. Click on this one because the red lights are quite interesting; at least to me.

This is a building I walk by frequently, but when I do it's mostly in the afternoons and it's right next to some taller buildings that block the direct sun. This morning I saw it this way for the first time in a long time. It's actually a western wall so it is facing away from the sun but all the buildings around it have mirrored or otherwise reflective windows and all the lighting pattern on the brick is a product of the morning sun bouncing off the east walls of the building across the street and reflecting back. I think it's fun. 

I'll just leave it to you to punch in and read the sign. It's a typical Texas story but that doesn't make the whole trope less entertaining. Especially when presented next to a brick mermaid...


There was once a restaurant called Carmello's that sat on 5th street, nearly east to the freeway. It was a traditional and nice Italian restaurant that served big portions, had white tablecloths and black clad waitpeople. One nice amenity was that they had their own big parking lot for customers. You drove in through a little archway and someone valet-parked your car for you. During one of the economic downturns (I think it was in 2001-2002) the business fell off, people started dining more casually, and the owners ran the numbers and figured they could make more money just running a parking lot close to the new Convention Center so they shut down the restaurant. At some point I think they considered doing something else with the property since most of the actual restaurant (but not the parking lot arches) was demolished but then the project was abandoned. Once everything cleared out I discovered that the entire back wall of the parking lot was covered with these whimsical fresco paintings. Some of them are quite endearing. I strolled slowly through the parking lot today as though it was a big, open air museum. Sadly, the harsh UV of the Texas sun will one day fade the paintings into oblivion. If I cared about antiquities I guess I would make a project of documenting them and then researching to find out who painted them. And why. I may actually be too lazy to do that. But I intend to do the photographic part...

We're having devilish weather here. It's been dropping down to almost unbearable lows in the nights. Last night I put bigger covers on the bed and noticed that it was forecast to be a bone-chilling 45° overnight. It was still in the 50s when I went for a walk. I took along a thick, casual sport coat and suddenly remembered how much I enjoyed having jackets with big pockets. I could actually drop an X100V into one of the pockets. It's only going to hit the mid-70s this afternoon and the sunlight is annoyingly bright and contentious. We'll soldier through. What else can we do? And then there's the hat. You may tease me but this image may just get me a gold star from my dermatologist....


And once again....the prow of Darth Vader's space ship. In downtown. See the reflection of the traintracks? Weird, right?

Take a break between a big project and the post production. Maybe get up in the morning and go for a walk. Shoot in the anti-planned mode.


I think it's always a good idea to look up every once in a while. It's especially good if you are a cartoon character and prone to having bank safes and grand pianos fall on your head out of open windows. 

I worked a full day yesterday, making fun photographs for a client. But no matter how fun it is, when there is money involved you have to plan, be on your game and constantly check to make sure you've got the details right. If you're not a bit tired when you get home from a day of immortalizing models for commerce then you are better at this than I. 

We wrapped early yesterday. I credit good preparation on the part of the clients and also the very professional nature of our talents. I just tried to hold my part of the adventure together as well as I could but I cheated by selecting my own make-up person and also bringing along a smart and on-the-ball assistant. 

Since I dodged the rush hour traffic I decided to pull off part of the post production bandaid and edit the images from the shoot before our late dinner. Thursdays are always (always!!!) pizza night at our house and it's a tradition Belinda and I started back in the advertising days. We were all young and a bit crazy back then and we were surrounded by creative people of the same age. We usually gathered at my apartment in Clarksville to eat delivery pizza and watch "The A-Team" on my 13 inch, black and white television set.

The "A-Team" was one of the worst written and most aggregiously over-acted shows ever produced and the cherry on the sundae was the inclusion of Mr. T as super tough, B.A. Barracus. His performances never ceased to amaze and entertain us through the beer goggles of pizza night. With 15 or 20 half drunk advertising "professionals" in one's apartment on a Thursday evening you might imagine that Fridays were our least productive days at the shop. At least during the morning hours....

At any rate, the ritual of Thursday pizza has stuck with us for better than 30 years. It's a hard stop for work on any but the most critical of Thursday projects. We're more sedate about it now that it's just the family. But once the vaccine is totally rolled out......(right...). 

At any rate I hit the edit hard yesterday. I was pleased to find that the technical stuff was right on the money so no frame-by-frame corrections were needed. I used Lightroom to convert about 2,000 raw files to medium sized Jpegs and once the process was spinning and grinding away I called it a night. 

My schedule for today called for doing the state sales tax report, getting checks to the bank and getting all the gear we used yesterday back to the shelves that keep it organized. But I've found that I'm a lot more productive if I put a bit of time and shoe leather between the shooting of a job and anything else mandatory/productive so I got up early, made coffee and a piece of whole wheat, multi-grain, sourdough toast, put some crunchy peanut butter on it then added a layer of blueberry preserves, ate breakfast, savored coffee and then headed out to the studio. I wanted to hit "upload" on the 2,000 files and get them into Smugmug.com before Ben and Belinda got up and started grabbing for their share of bandwidth...

Button pushed, gallery created,  I headed into town with a cute, happy, precocious and very able, black  Fuji X100V hanging in front of my chic sport coat. 

I was making a big loop through the downtown area when I came to this new commuter train station, adjacent to the Convention Center. I looked up at these shade constructions modeled after an Imperial Cruiser from Star Wars and noticed that the underside of each one was made up of mirrors. I thought they were funny and also visually interesting. Can you find Waldo? (the photographer...). Hint, he's in the second shot.


In a marvelous bit of "Wow! That never happens!!!" my client from yesterday has already made their selections of six different looks for each of six models. I have the list in hand and I'm changing gears back into "work mode." It's the fastest turnaround/decision-making I've ever experienced with a client. 

More from this walk in the hopper. Please stay tuned.  

Thursday, March 18, 2021

Back at work. Photographing people in lab coats. But for a really cool advertising campaign. Which camera and why.

We had an auditorium that could safely seat 300 people at our disposal today
as our main studio. It was an embarrassment of square footage riches!
Easy to distance at a shoot when you've got a huge lobby for the talent to wait 
their turn in and five or six thousand square feet to shoot in. 

I just finished up the first big, juicy photography job of 2021. It felt so wonderful to be back in the middle of a project. I can't show today's images since the client hasn't even seen the finals yet, and I don't want to mention the client by name because they are in a highly regulated industry and might not be comfortable with the too much information floating around, but I did want to write about which I camera I chose to use for the job and why. 
photo: ©Austin Brown

Note the "cheat sheet" taped to the leg of my tripod. It was there to 
keep me on task and help me remember to work with the talent
to get six different "looks of excitement." 

photo: ©Austin Brown

We were checking the histogram on the camera and then 
double-checking it against the waveform monitor on an Atomos.
Note the N-95 mask on your heroic photographer ...

photo: ©Austin Brown

photo: ©Austin Brown

Austin Brown was giving me a master class on selfie creation. 
I've not mastered the genre yet. Hard to do "duck face" under
the face mask and have it "read."

If you guessed that I used the Leica SL2 or the Panasonic S1H because of their high resolution and great image quality you'd be close, but no cigar. 

Let me set up the day for you and then we'll get to the camera choice. 

My client makes very, very high tech medical testing instruments. They sell them all over the world. We've photographed their products in the past and have also done a few shoots which show their own internal scientists using the newest of the machines but we've never done a "people only" ad shoot for them...before today. 

Our brief was to go to their location, set up appropriate lights and a background and then photograph six different talents showing six different emotions ranging from pure excitement, to (happy) disbelief, to serious pride. I needed to direct each of the talents through the range of emotions and make photographs that have great skins tones, interesting/pleasing lighting, and which don't lose detail in their white lab coats. The photos also had to be shot with the idea that we'll be dropping out the backgrounds and delivering layered Tiff files. 

I'm a promiscuous shooter. I love to overshoot because you never know which image/expressions the client will like, and a good day's worth of work should be productive enough to get tons of images for the client as well as images that I might like even better. 

Over the course of our photography today I shot about 3,000 frames. From that bucket of photos I edited out about a third of them and kept 2,000 which were well exposed and sharply focused. Most of the files I tossed were because of the talent blinking, or from me shooting in between the looks the talents were working on. Some frames got tossed because I was trying to rush the flash recycle and ended up with black frames. And some images were tossed just because I didn't like the expression, or gesture, or balance. 

I knew we'd be shooting a lot of frames because the clients wanted to play around, experiment with looks, and then really drill down on a look once they hit something we all liked. We ended up doing a lot of fine-tuning, from expression to hand position to the amount of finger curl. 

Since I knew we'd be "file heavy" I decided that 24 megapixels would be more than adequate for this project. Compared to the 47.5 megapixel cameras we were able to use half as much storage and cut way down on all the processing time. It's a real consideration when all 2,000 of those files we did keep are 14 bit raw files.... 

I have a couple cameras that shoot 24 megapixel raw files but I'd done someone-dpeth testing recently with the S1H that made me smile, and I also remembered that it's the one camera in the system with an anti-aliasing filter in the optical path. I wanted to take advantage of that to cut down on any moiré I might provoke from the synthetic fabric lab coats we were having the talents wear. I've also found the S1H to have a slightly different color palette than the other S1 cameras and it's something I prefer. 

I put the S1H into a cage so that when I used it vertically (almost 95% of the shots were verticals) the weight of the lens wouldn't twist the camera down. It's a great way to shoot vertically if you want to be on a tripod. And I usually am partial to the added support...

I know a lot of photographers like to shoot tethered to laptops when they are on location but I absolutely detest doing that. You are at the mercy of the tethering software and since each frame is transferring to the laptop over USB at full resolution you have a huge amount of data transfer going on. If you shoot a lot and very fast you'll bog down quickly and end up spending a lot of time waiting for the files to get to the laptop, and finally end up on the screen. My solution is, I think, far superior for any kind of shooting except for ponderously slow product photography. 

I hook up an Atomos monitor to the camera's HDMI port and use it as a system monitor. The image data transfer is limited to the embedded preview Jpeg and it's also limited to a 4K size. The monitor keeps up with my shooting speed. The Ninja Flame monitor I use is a really good color and density match for the Retina screen on my desktop and I can put the 7 inch monitor just about anywhere with a 15 foot HDMI cable from the camera. 

I can also daisy chain addition monitors if there are a number of people in the same area working through an "on the fly" approval process. We run the Atomos monitor with A/C power so we can keep it running all day. We're not writing files to the Atomos; just using it as a monitor. Clients love it since it's much bigger than a camera screen and they can watch the files come up on the screen in real time as we shoot. I don't understand why more photographers don't do this instead of tethering to a computer. If you have a reasonable argument to make about the value of actual tethering please let me know!

Today's shoot went smoothly. The client hired real talent (and they were all great) from a well respected agency which meant they were all well vetted and reliable. 

I worked with a make-up person named, Serret Jensen. She and I have worked together on video and photo projects for Zach Theatre for about ten years. We set her up in a 2000 square foot room, complete with high ceilings and good ventilation. Talent came to her one at a time and she wore a mask under a plastic face shield while working with each talent. 

I directed the client to the talent agency and left it to them to choose the right people and the right looks for the job. They were spot on!

Since we had a lot of ground to cover and were setting up and using five or six lights for the photography I brought along a great assistant. His name is Austin Brown and he's one of the technical lighting directors at Zach Theatre (when they are open and running). He's a pleasure to work with and kept all the lights humming (metaphorically). He also did the heavy lifting so I could act like I was concentrating on the fine details of photography in front of the client. 

Had we been looking for only one "look" from each talent I might have used one the higher resolution cameras but I've been spot checking the files we shot by looking at them at 100% and I can't imagine the difference would be discernible to most people when the images end up a bit smaller than a full page in a trade magazine advertisement. 

We hit the location this morning at 8:30 and were set up and shooting by 9:15. The client had set the schedule with the idea of ending around 5 pm but I was pretty sure we didn't need that much time. We photographed all but one talent before lunch, broke for an hour to eat a nicely catered lunch, and then grabbed the images of our sixth talent, followed by some stuff the client wanted to try out after having reviewed the morning's work. We were packed and out the door by 2:30 which allowed everyone to avoid the resurgent Austin road traffic. 

The initial edit and import into Lightroom, and the creation of a back-up folder, were done by 5:30 this afternoon and we're ready to power down and enjoy some pizza and a glass of wine. 

It feels so great to be back in the mix. More like this please!


One of my quiet spots from the day before.
I got there to ruminate over how I will design my shooting 
process for the next day. 

It's good to have quiet places around town in nice settings. 

Stairs. No buildings...


Tuesday, March 16, 2021

Calm images. Palette cleanser. Remembering how nicely the Fuji XE3 and the 60 macro worked together.


I love the feedback I sometimes get from other professional photographers who read the blog. Mark sent a comment gently suggesting that I use a light gray background on Thursday's shoot instead of green screen or white. And considering that keeping detail in white lab coats is important I thought I should test his suggestion. I shot some tests against a light grey, seamless background and they were just right. It will be easier in the set-up to shoot this way instead of on white, and it will be easier in post than shooting against green. Sometimes I get stuck into one way of doing things and forget how important it is to learn new stuff. The motivator for me is how much Photoshop has improved its selection tools. Getting the right background means a one click drop out (with some "refine edge" fine tuning) versus the old school methodologies I learned early on. 

I was doing a deep dive through the older hard drives that live on my desk to see if there were more photos that needed to be backed up to the cloud yesterday and I found this series of images which were done with a Fuji Xe-3 and the 60mm macro lens. They're nice. Kind of calming a relaxing. I don't think they need to do more than that. 

I've looked at the Xe-4 from Fuji and I really like the non-stylistic body style. It's just so spare and utilitarian in a 1960's Russian industrial design way (albeit with rounded corners...). It seems like the perfect answer to people who like the overall idea of the Fuji X100V but would never get around to using the bright line finder and who really would like a choice of which lens to use for each situation. 

The camera uses the same 26 megapixel X-trans sensor as most of the rest of the line and has lots of the same, juicy film simulations that goad us into shooting Jpegs but it's so small and light. The body has been stripped down to its essentials which means no mf/af lever on the front and no built-in flash. I think the black body is minimal but at the same time a classic small camera camera. Grab a 23mm f2.0 and a 50mm f2.0 and you've got one of the smallest and most practical travel-cam systems I can think of.


OT: I have a quick question for anyone who has already gotten both doses of the Moderna Covid-19 vaccine: Did you have any symptoms of temporary depression or depressed thoughts? Asking for a friend who could not get to sleep last night, even after dosing with Melatonin and milk. He was up reading a book in the living room at 3 in the morning after tossing and turning for hours.... 

He even missed swim practice.... Just curious. And, of course, asking for a friend. 


Monday, March 15, 2021

I announced this on LinkedIn and I thought I'd also announce it here. We're back.

Got the gear. Now it's time to use it.

 I've been on an extended hiatus from the business for the better part of last year, and the first few months of 2021.  I  was waiting on the vaccines to arrive so I could work safely and also provide a better level of safety for clients and crew. 

I've now gone through the vaccine regimen and the 25th will be two weeks since the last dose; as recommended by the CDC and other experts as the time period for optimum immunity.

As of March 25th I'll be accepting new projects from new and existing clients. We're offering one-to-one portraits in the studio as well as environmental portraits and commercial photograph for advertising and marketing on locations. I've also sourced a good rental studio hosted by a team that is dedicated to Covid-19 best practices. 

We'll continue to work with face masks and to practice good social distancing but it's time to start working on something more challenging than leisurely walks through the Austin downtown. 

We have already been booked for several larger projects and are working with clients to ensure that our health standards are shared.

I can't speak to markets outside of central Texas but it certainly seems like the second half of 2021 is going to be.....busy.