Showing posts with label Sigma 60mm dn Art lens. Show all posts

Wednesday, January 27, 2016

Camera Confusion Continues. Why use an Olympus OMD EM-5.2 to do still life when you've got a Nikon D810 sitting on the corner of your desk...

Still life set ups get tight. See the Westcott Fastflag behind the camera?
It's the diffusion rimmed in yellow. 

I guess there was big excitement here in Austin this week. Apparently the folks from Olympus chose our fair city in which to launch their new Pen F camera. One reader asked if I was invited to participate and preview the camera ahead of time but, sadly, I was not. I can only imagine the other camera makers remembered my ill-fated decision to work with a progression of Samsung cameras and have never forgiven me. Likely never will. And that's okay because the lessons I learned from those two years was the vital importance, as a person who reviews cameras from time to time, never to have an ongoing relationship with the camera makers. I don't want to have to defend my credibility every time I write something nice about a a camera and conversely I don't want to spend time fending off the accusation that I'm a "shill" if I write something honest, but critical, about a camera from a maker I haven't previously used. For instance, if Nikon sent me cameras to test on a regular basis and then I wrote a blog wondering just what people see in the Fuji system I would get endless Fuji acolyte hate mail that would more or less start with..."I expected no less from a Luddite Nikon user! Don't you understand that the future is mirrorless????!!"

My friend, Andy, was one of the testers and he wrote along and involved initial review of the camera that he posted last night here.  His review is much more in depth and nuanced than are many of the reviews on the web. If you want to read the opinion of someone who owns and uses many Olympus models, as well as cameras from other brands, he's the one to go to today for the Pen F.

I wish I could have played with the new Olympus camera today since I am considering buying one when they come out but.... I've been hard at work the last three days on......work. 

I got back from my Craftsy.com conference very late on Sunday night and was a bit mopey because Ben had headed back to school earlier that day. I hit the ground on Monday with a full schedule of post production. Tues. was meetings all day and an interesting dress rehearsal all evening followed by post processing of 1200 theater images until the wee hours of the morning. But today was wall to wall still life photography. I sequestered myself away in the studio and only came out to drive the mile and a half to Thundercloud Subs to get their famous, Texas Tuna sandwich. It's basically tuna salad, guacamole, sliced jalapeƱos, Thunder Sauce(tm), and (for me) provolone cheese. We top it off with lettuce, tomato and onion. If you get the big one, on fresh, whole wheat bread, it should last you till a late dinner...

At any rate, today was my day to shoot a prototype from a high technology start up. A real product, not software, not vaporware. It was a black, metal box and the front was covered with some of the most heavy duty heat sinks I've seen in a long time. The advertising agency and the client had one brief brief: Shoot as many interesting angles and details as you can on white. 

As most of you are aware I spend most of my time making images of people and it takes some concentration to change gears and get all detail oriented with products. (more below).

A view from the back of the set.

That's not to say that I don't know my way around still life photography. I've shot hundreds of computer products for Dell and IBM, food for magazines and cookbooks, and for two years back in the 1980's I shot an ad a day with books and products for BookStop Bookstores, mostly with 4x5 cameras and sheet film. And buckets of Polaroid. In fact, at this point I think it's safe to say I've logged 10,000 hours just in those pursuits. It's just that I really like the people part.

The RPS CooLED 50. This light can also take a battery pack which takes 
12 double A batteries. Too zany for me right now.

The first thing I have to do when people want still life work is to figure out which camera system I want to use and how I'm planning on lighting stuff. We don't need to get the background perfectly white or shadow free since we'll be making clipping paths so I concentrate on using controllable lights that will help me deal with reflections on reflective surfaces. On the last few still life jobs I've done I've used the EM5.2 cameras because I like the combination of extensive depth of field coupled with the hi-res (40 megapixel) files. The still life stays still and the camera is on a tripod anyway. 

At first glance the Nikon D810 looks like the logical choice because of the full frame sensor and the high resolution but I'm leery of stopping that camera down too far and having to deal with diffraction effects. At some point the files start to get muddier and muddier as you head toward f22....

The Olympus EM5-2 is limited to f8 if you intend to use the hi-res mode. If you need more depth of field beyond what that combo (f8.0 and smaller sensor) gets you it's pretty easy to do some remedial focus stacking. I ended up choosing the Olympus because I think the high-res mode is pretty cool and it gives me a chance to use the Sigma DN 30mm and 60mm lenses. I am rewarded, at f8.0, with amazing sharpness out of a set of $200 a piece lenses. Pretty damn amazing.

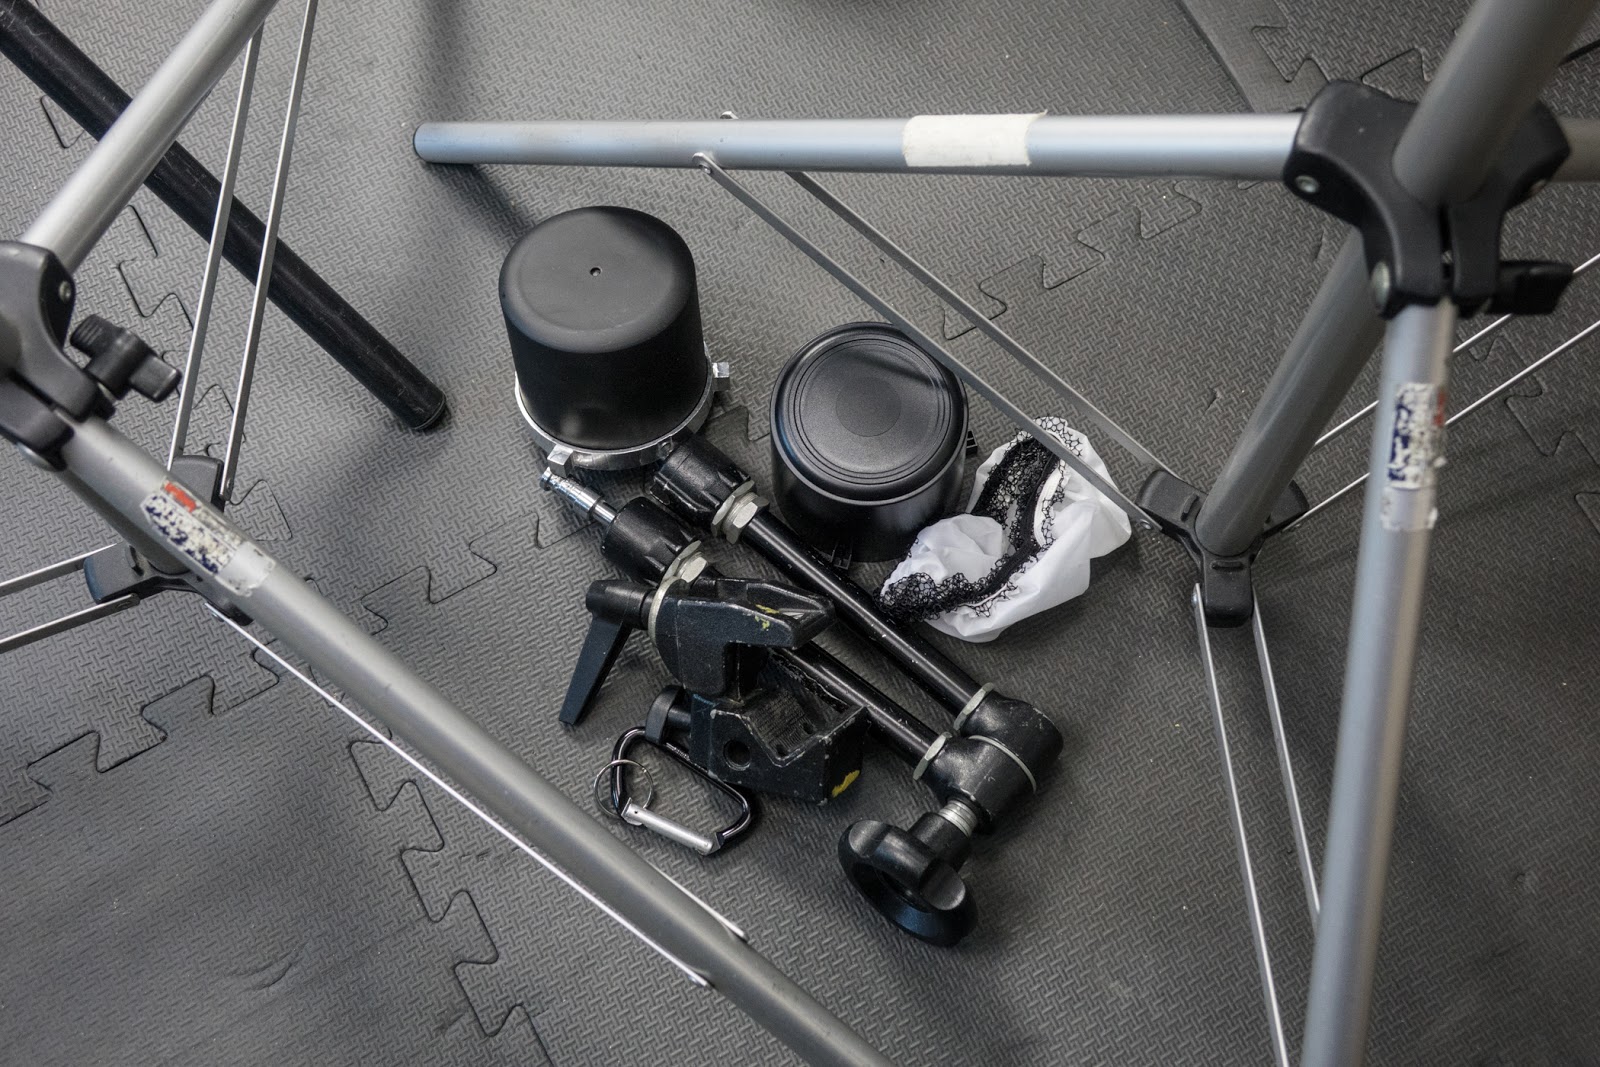
Light covers, diffusion sock and a Manfrotto Magic Arm lounge on the floor, waiting their turn in some sort of rotation.

And that brings me to lighting gear. I like to use continuous lighting on product shots because I can see, on the rear screen on in the EVF, exactly what my final shot is going to look like before I trip the shutter and I can tweak it until what I've got is a perfect as I am able to get.  The big fluorescent panels are too diffuse for work like this. Not that I don't want most of the light sources to be diffuse but, I also want to skim some hard light through the shots to gain a greater impression of sharp edges. That's where my cheap RPS CooLED lights come in. I now have two of the bigger models, the 100. They put out a good amount of light and they are the first LEDs I've owned that I can stick into a softbox and not feel like the light loss is is too much. In fact, I used one of these big lights through a small soft box today, over the top of my shooting table for a main light. 

I also have two of the model 50s, which are one stop less powerful. But they are still brighter than most of the panels I've used. The beauty of all of these fixtures is that I can use them just as we used to use traditional tungsten lights. I can put diffusion scrims in front of them, put them into soft boxes or umbrellas and, with the standard 10 inch reflectors, I can even feather them nicely. Two of the reflectors have barn doors so I can created tighter, hard edged beams of light. 

Ah. The Manfrotto Grip Head. We use them for everything. 
In this instance I'm using one to hold the Westcott Fastflag
with a diffuser. Kind of like a highly customizable softbox. 
You control the intensity and diameter of the light flow based on distance. 

Shooting a new product is kind of like being on a first date. You have to make small talk and get to know the geography. Today's featured product would not stand up on its own. The giant heat sink on it made if very front heavy. I finally got it to stand up straight by attaching a nylon string to a bracket on the back of the unit and anchoring the string to a sandbagged C-stand. The product also had beveled edges which meant that it wouldn't sit on its side without some sort of support. The secret is to use enough support but make it concealable....or easy to PhotoShop out. 

The finish on the product was just shiny enough to make my morning and part of my afternoon challenging as I tried to "play pool" with the lights and bounce them into quadrants that would not return unhelpful reflections. Word to the would-be-wise, check your lighting at camera position, the effect is radically different when you move away from the camera but what the camera sees is the only thing that matters. 

Invariably, the client who is sitting ten feet over to one side will mention that he or she seems a big glare from where he or she is and wonders how you intend to fix it. I am always gentle as I guide them to the camera position and beckon them to look once again......

One of my "secret weapons" is a horizontal arm on my Gitzo tripod. 
With that tripod and arm I can arrange the camera to shoot straight down 
on a subject. Here I have the camera tilted back to get a specific angle. 

It's old news, of course, but one of the benefits of the LED lights is the cool working environment. Funny though--- today it was chilly outside and I found myself thinking how nice it would be to work with 3 or 4 thousand watts of tungsten lighting. We would have kept nice and toasty warm without having to turn on the studio heater.

Yes. I will finally admit that the tilt-fllippy screen on the back of the camera does 
have its uses. I was often putting the camera in positions that would have required 
better balance than I think I can muster to get the shots. 

As soon as I came to grips with the idea that I'd shot every conceivable angle and detail of this new, prototype (meaning not totally polished and cosmetically perfect) product I jumped right into post processing the individual files. Since I wasn't looking through a series of different expressions (people) I was able to select the best frame from each set up and just work on those. 

No matter how much I cleaned the product I have surrendered to the realization that some very fine (and very white) dust will end of statically sticking to areas of the product. It's dust that's so fine I can't see it with my naked eyes but it becomes very visible the you blow up 40 megapixel files to 100%. So, after I color correct, exposure correct and use the lens corrections to make things line up I spend about five to ten minutes per file spotting dust with the healing tool in PhotoShop. Once I like what I see I save a full res LZW Tiff file and go on to the next image. Today we did a bunch. At the end of the day I use the script in Photoshop to automate making Jpegs. It's called "Image Processor." 
I generate full size Jpegs with #10 compression and then smaller, web rez Jpegs that are easier for some clients to handle and review. 

I uploaded all of the files to WeTransfer.com and send them to all the involved parties. My hope is that everyone will write back to me and let me know how much they love the files but, being the anxious type, I generally wait on pins and needles, expecting the sky to fall and my career to end at any moment. Tragic. I know. 

So, here's my beauty shot of my favorite Olympus camera of the moment. 
Will I buy the new Pen F? Not after being snubbed!
Just kidding. I'll line up like an Apple iPhone buyer to get 
my hands on the first black one in Austin. Count on it. 

I don't usually do my photography and my processing on the same day. I like to take a walk or a swim after the shoots to let what I've done sink in. But this week is somehow different. We seem to have projects stacking up like serial romances and I'm trying to make sure the "back office" work doesn't stack up and end up biting me on the butt at some inconvenient moment. Tomorrow I photograph the president of one of (maybe "the") biggest real estate company in the country. I'd like to have all the other stuff cleared off my plate because, invariably, the photo session of busy executives if followed by a tense conversation with the administrative assistant in which the words, "We need to have all of these by tomorrow morning!!!!!" get repeated over and over again. It's like a tourist trying to bridge a language barrier by repetition and volume.

The schedule says I get a break next Thurs. I can hardly wait. But what camera will I want on that day to take on a long walk through my home town?

Some panels are here to block window light. 

Bag it. Or knock something over and pay for it....

I'm sure next year I'll be asked along on an Olympus junket. But isn't it nice to know that I wrote this because I found a good use for the camera, not because of a nice dinner and the open bar?

Thursday, June 18, 2015

A few "between the real shots" shots from yesterday's restaurant shoot at Cantine. The 40 megapixel files are wonderful. So are the 16s.

EM5.2+ Sigma 60mm f2.8

The look of the Hi-Res, 40 megapixel files is different than the look of the regular 16 megapixel files. I can't put my finger on it exactly but it may have to do with the color purity. The actual color is more accurately sampled in this method and that may lead to fewer things that trigger my subconscious assessment of the photographs. The smoothness of the surface of the coffee cup seems so different...

On another note, I love working in restaurants like Cantine. While we're shooting we can always get a really, really good espresso. And the snacking while shooting is first rate.

EM5.2+ Sigma 60mm f2.8

I was photographing a salad in the little sweet spot of light we'd selected when I looked over and saw the way the light was hitting our plate of salmon and blistered tomatoes. I turned the tripod and shot the angle above. I think the color purity of the tomatoes is stunning. The Sigma 60mm lens is obviously doing a good job.


                                                              EM5.2+ Sigma 60mm f2.8

Even the aftermath of dining can be interesting in the right light. 

This one is a Nikon 610+105mm f2.5 shot. I brought this combo along for BTS shoots. 
I used it for fun extras.

EM5.2+ Sigma 60mm f2.8

I have to hand it to Olympus on the quality of the regular files out of the camera. They have a wonderful balance of colors and tonalities. I would give credit to the camera for the clever white balance but I was using one of the presets so that hardly counts....

EM5.2+ Sigma 60mm f2.8

We wanted to shoot some video of a wine pour but I couldn't resist getting a few still shots on our second version. My video partner, James Webb was doing a great job covering the handheld video work so I had the freedom to just play around a bit. Love the look of glasses illuminated by big windows. And I love what the wide open 60mm lens is doing with the stuff in the background. I am not a "bokeh" expert but the out of focus bottles in the background look gentle and kind.

Another random D610+105 shot. It's fun too.

This wraps up my week of Olympus commercial shooting stories. The cameras work very well and as we use them more and more either we or they are getting more efficient in overall battery use. We both had plenty of reserve at the end of the shoot. I had done still life in the morning and then the food and pour shots in the afternoon with the same camera and battery combination. Next time I won't bring the little Pelican mini case with the seven extra batteries. I'll just stick one in my pocket to be safe....


Wednesday, June 17, 2015

Olympus OM5-TWO Delivers the Goods in the High-Res Mode. Two jobs in one day with more pixels that I know what to do with!!! An amazing keeper.


I started out my day at a tech company. My job was to photograph several servers and then a rack of servers against a white background. We'll be clipping out the backgrounds later tonight. Recently I did a job similar to this one for the same company using the Nikon D810 and several different Nikon macro lenses. That job was very successful. The client will use the images in everything from website illustrations to trade show graphics. 

And while everyone was quite satisfied with the output from Nikon's best camera I am never one to leave well enough alone, nor do I like to shoot similar stuff the same way every time I head out the door. As I was packing the night before I decided to take the Olympus EM5-Two cameras along with me this time, instead. I packed the two camera bodies and about ten little lenses into a Pelican case, grabbed five LED panels of assorted sizes, and my favorite location tripod and headed up to North Austin to set up a temporary studio in my client's big conference room. 

I have finally really mastered the Hi-Res mode in the Olympus cameras and I was determined to give the system a workout today. I used the Panasonic 12-35mm lens and shot everything at f8.0. That's the smallest aperture the system will let you set while using the Hi-Res mode. I am curious to find out if I can cheat and use an old manual focus lens on an adapter but that's for another time. I set the Hi-Res to give me a full second delay between touching the shutter button and starting the eight shot process+processing.  The Gitzo tripod I used settles down fast and I was as delicate with the shutter button as could be. Like a surgeon. Seriously.

(Quick addition for those uninitiated into the Hi-Res world of Olympus: The Hi-Res setting is a menu item that allows the camera to shoot eight fast frames of a subject. The camera moves the sensor between each exposure by half the pixel size. The oversampling creates files at a size of 40 megapixels and does so without the danger of aliasing or moire. The color is sampled in such a way that it is more pure than color from a single shot camera. It MUST be done on a tripod or you'll just end up with a mess. This new feature is very, very good.)

I was nervous about using the feature on the shoot but reviewed every single shot fired, at 14X. They were all perfect and perfectly detailed. Re-badged Dell servers never looked so good. I was very happy with the results, more so because my paranoia at what might go wrong pushed me to make a series of careful custom white balances and to meter more intently than I might have if just shooting routine, 16 megapixel raw files. I wrapped up that shoot and headed back toward downtown to my next appointment. 

You'll remember that I've been working on a video for a new restaurant called, Cantine. My friend and partner in video crime, James Webb, and I, had shot a bunch of live action cooking and bar shots last week, using the Olympus EM-5-Two cameras and the same buffet of lenses. We decided that we wanted to incorporate some hero shots of the food into the video so we arranged to get to Cantine after their lunch rush and have the chef prepare four or five dishes for us to videotape (with a bit of camera movement) and also to make still images. 

I manned the still camera while the more seasoned and experienced motion artist grabbed the video duty. I set the camera for the Hi-Res mode and did all of my static shots with the bigger files. The top images of this blog is the full frame of the 40 megapixel shot (reduced to 2100 pixels for the blog) while the bottom image, just below, is a 100% crop of the same image. 


I am very happy with the color, tonality and sheer resolution of the photograph. I think it's wonderful. I might select a lighter version for the final use but I grabbed this one first because I was so excited to see just how well the system handled this sort of shot. 

The lens used on this image was the Sigma 60mm f2.8 dn Art lens that I so eloquently praised not long ago. I think it's great wide open and even better stopped down to f4.5 or f5.6. If you shoot m4:3 and don't have this lens you should consider spending the small sum of $220 and adding it to your collection. It's a very nicely done lens and it turns in one great performance after the other. 

I've now shot about 6 hours of video with the Olympus EM5-Two cameras and a selection of lenses and I am upgrading my appraisal of this camera considerably. While the learning curve is a bit steeper than some other cameras I shoot with it is capable of pretty tremendous still image quality and very good video files. I don't regret my choice to upgrade to these cameras in the least. 

The usefulness of the Hi-Res setting for food photography, technical products and architecture should endear it to a lot of users who are eager to downsize from bigger systems while keeping the quality of their deliverables high. If you try one you will almost undoubtably love it.

James and I should have the video up in the next week or so and I think you'll be impressed by the footage(?) these cameras can turn out.

That's all I wanted to say. Now I need to get back to making my clipping paths and retouching fingerprints off the server chassis. That's what I get for not bringing along my cotton gloves to the first shoot.....


Added June 18, 2015: About the iPhone App: The iPhone app for the EM-5.2 will trigger the camera but NOT in the Hi-Res mode. It only works with regular Raw and Jpeg settings. In a previous blogpost from my first adventures with the camera I was mistaken about being able to trigger the camera in hi-res mode. I was working (and being frustrated and on a schedule) I shot a number of images with the Hi-Res mode released by hand and then tried to do the same thing with the phone app. I reset the camera to raw at one point and continued doing the job. When I looked at the images later there were a number of Hi-Res files that were sharp and well done and I assumed that those had come from my the phone app triggering, not remembering my switch back to raw. Instead they were a result of my delicate touch. But it was hit and miss. I am beyond happy to finally find, and learn how to use, the delay method and it works solidly every time. Sorry for my inaccurate testing procedures on the first go around. I blame it on the staff here at VSL.... And the lack of an 8.5 x11 inch, color illustrated, leather bound owner's manual from Olympus....

Thursday, May 21, 2015

Now writing my hands on, definitive (for me) review of the Olympus OMD EM-5.2 camera. It's a well mannered and mature product. It's photography in 2015.


I'll start with the typical disclaimer: I am not an Olympus employee. I have never been an Olympus employee. I have never received free or discounted equipment from Olympus. I have never written a review of an Olympus product in exchange for money or equipment. I currently own two Olympus OMD EM-5.2 cameras and a smattering of lenses, all of which were purchased at Precision Camera for the same retail prices everyone else pays. If I link any of the products I review to Amazon.com, and you click through and buy, it a small amount of money, based on the item and pricing, will be paid to me from Amazon.com.  It's not enough money to cover the cost of a review or to make a dent in the ever declining college fund for the boy. Don't worry, I can guarantee you that your purchases are not making me wealthy. But it's nice to get enough in affiliate fees from my writing to be able to buy premium coffee instead of the older, surplus stuff we were getting from the ship channel salvage company in Houston.... 

My Review of the Olympus EM-5.2 cameras

Added after publication/glorious video sample: https://vimeo.com/137964319


Chrome EM5.2 sitting on the Manfrotto Hybrid Fluid Head.

A bit of history. The first Olympus product I owned was a used, black Olympus Pen FT, half frame film camera. I still have it along with four other copies, one black and three chrome, that I collected over the years; usually for less than $100 per body. I also have an almost complete set of the jewel-like half frame lenses that were made specifically for that system. The lenses, with the right adapters, work remarkably well with the current micro four thirds systems and this makes me very happy. It's wonderful when a new product can bring renewed usefulness to an older product line.

The original Olympus Pen FT. This is the one that started it all for me.
Smaller and lighter than the full frame cameras of the day it featured an 
optical view finder, a vertical film frame and a titanium rotary shutter
that sync'd at all speeds from 1 second to 1/500th of sec. 
72 half frame images on a roll...

At any rate I bought my first Olympus micro four thirds format camera, an Olympus Pen EP-2, in 2010 specifically with the intention of using with the older Pen FT lenses. That experience started my off again, on again relationship with the Olympus mirror-free system.

Apples and tangerines. One thing you need to know